

Mobi PC Help:
Introduction:
Mobi PC is an app coupled with a desktop server that can be run on your PC or laptop. The app is available on Android and Windows Phone can be connected to the server via TCP connection and allow you to control essential functions on your PC such as turning PC on/off, adjusting the volume and controlling your web browser. You can download Mobi PC apps from various App stores likes the Android Play Store and Windows App. The free app will only allow you to access the free basic features of the program. This includes switching PC on/off or restarting. To use the full program features like controlling PC Volume you need to upgrade the app. Once upgraded log out of both the app and server and re-login to activate all features!
Mobi PC Why Would I Need It?
- Turn your PC off while you are away from it
- Turn your PC off when outside anywhere in the world!
- Automatically power down the PC while youre sleeping
- Control your PC from anywhere in the world!
- Monitor what kids or other users are doing on your PC via desktop screenshot
- Control FireFox or other browsers from your sofa
- Replace a broken mouse
- Use as a wireless mouse & keyboard
- Send a Message or Speech to anyone using your PC when youre outside
- Copy clipboard text/url from PC to mobile or vice versa
- Cast images from your phone to your PC or laptop (Android only)
Getting Started:
You need to install the Mobi PC Remote Control App to your phone by visiting the relevant App Store. If you install the free version then you will only be able to use limited features unless you upgrade it. Download the server installer. Unzip the .msi file then double click it to install Mobi PC Server. Follow the onscreen instructions. When the server software loads up the first time you will be shown the help menu. Press backspace to exit. You will now see the main menu. From the left you will see the smaller Settings button, the Start Server button the the Register button. Before you can use the Remote Apps you have to create a new profile. Press the Register button.
Free Version Limitations:
On the free versions you can only power down the PC/Laptop no other functions will work including custom actions. The free versions are only ad supported. The Pro upgrade allows you to disable ads.
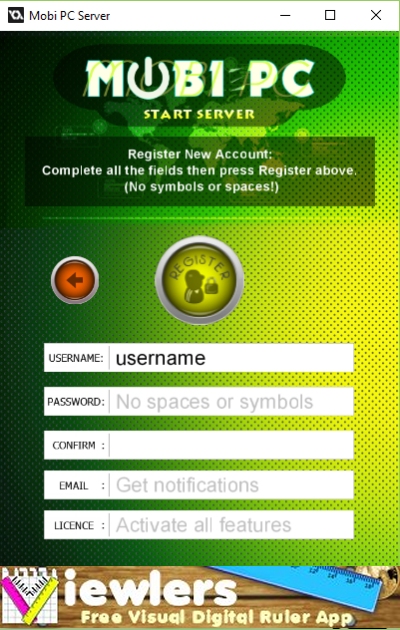
Creating A Profile:
When you sign up using a valid email address and unique username you allow us permission to send you emails and notifications. You can also opt in to our newsletter to receive marketing emails and other offers. Register a new profile by entering all the fields. Once registered you may receive an email and then you can login using your new username and password. Make sure you avoid using any symbols or spaces in your password. You can use a mixture of upper case, lower case and digits. Dont forget there is an optional PIN feature that is only stored locally on your PC once set which adds an extra level of protection.
Server Setup:
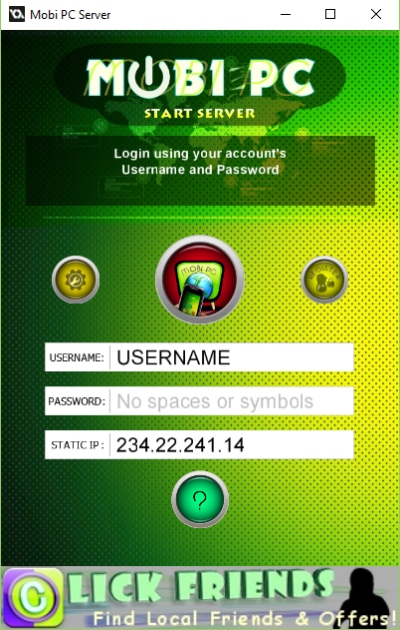
If you are using a router you may have to do some Port Forwarding. We use ports 5454 to 5455 so make sure you open these ports or you can set your own PORT to use in the server settings! On some PCs you will find you dont have to do this. Please try first. If you cant connect apps to the server please try unrestricting the connection/access. If you have firewall you will need to add Mobi PC Server to the list of program exceptions so it can send and receive data through the Windows Firewall. If you are using a VPN or Proxy server please note that Mobi PC Remote Apps require your real external IP. If you have VPN/Proxy the server will detect a non real IP. The solution is to either switch off VPN/Proxy or enter your real external IP into the server before starting! On some PC you may also have to run the server as administrator. Once running you can connect to the server by logging in via any Remote app. One more thing you can try for connection issues is to set your server device IP address as STATIC in your router or Adapter settings (You will also have to then set the subnet mask e.g as 255.255.255.0). The server is not set to handle multiple connections and it will only handle requests from the most recently connected app or desktop client. To use some features you must run the server as ADMINISTRATOR! Any other questions please ask us in the FAQ section or in the comments section below.
Server Extras:
After logging in you will see the server start/stop button and the Extras button. This has several features such Cast image to remote app, Send file and Send Message. Send File is experimental and may not work on all phones especially if access to phone folders is restricted as with Windows Phones. The Cast images features uses the quality setting used for desktop captures set from the remote apps. Locate Phone can be used to play distinct ringtone on the phone using Mobi PC remote app so you can find it in case you lose it; this only works if the app is running in foreground and the screen is not locked (this limits its use but maybe you can still find a use for it?)
Server Settings:
You can access the settings from main menu. Here you can select the relevant checkbox to activate/deactivate the required setting. The server can be set to run at Windows startup. You can also set the PIN, view the PIN and remove the PIN protection here. To enable the start at Windows load feature make sure either that the server runs WITHOUT administrator permission as otherwise it wont start, or disable the UAC notifications see this site for more details.
The PIN means before the user can join the host they will be asked for the PIN number. You can also access the Custom Settings here by clicking the small yellow button with the cog and User symbol.
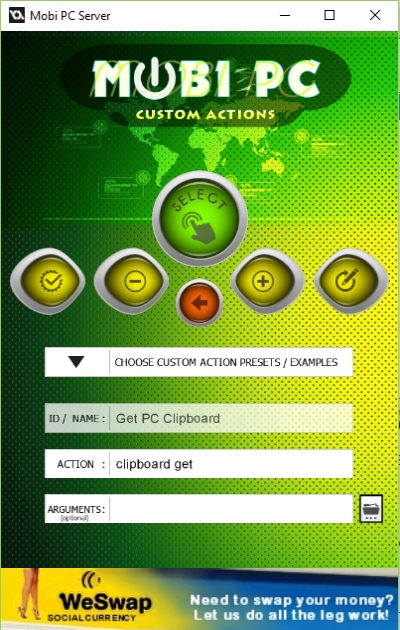
Custom Setting:
Custom settings allow you to set custom actions that can be executed via the app. Examples include ‘starting a program located on your PC’, ‘opening and shell program or viewing a file’. From the Drop Down menu button you can see a list with some examples you can use as a base to create new actions.
Please enter a unique name for your custom action. Enter the Action such as speak, open, close. Then enter the arguments, which may be a URL or local file path obtained by pressing the file browser button next to it. Press the Big Green {‘Select’} button to see the existing Custom Actions, which you can then edit/update or delete. The Update button is the one on the far right with pen image with circular arrow. The button on the far left is the Test button that will execute the custom action you have entered on your PC. Please be careful using this the action is executed in real time!
Full list of accepted custom actions and arguments:
With custom actions please pay attention to letters casing and spaces. Some actions need (or optional) input from the app user, so when this action is selected on the app they will be asked to supply the arguments!
open [program] (open a known program such as notepad e.g open notepad) (no args1 needed or optional)
open file (where ARGUMENT is the local path to file)
run (argument is the shell program)
execmd (argument is the command line function to execute)
clipboard get/set (no arguments needed or optional the value to set PC clipboard to)
Keypress using nircmd e.g b i n g+period+c o m+enter
speak (argument is the text to speak or enter ‘ask user’)
showsounddevices (no arguments needed)
show desktop (no arguments needed)
Show Message Box (argument can be “ask user” or enter the message to show)
killprocess/closeprocess (argument is program name e.g iexplorer.exe or full path to process e.g “c:/windows/system32/calc.exe” or process ID (PID) e.g /8768)
cursor set (argument can be “ask user” or a preset position such as “100 100”)
win focus max/min process/ititle (you can omit max/min. Argument can be “ask user” or the name of the process/title of window – the title can be just a few letters contained in the name, e.g if you entered fire it could target firefox. It can also include additional info like text to send in inverted commas)
win min/max/center/close/normal/disable/sendmsg alltop/foreground/process/ititle/class/title (argument can be what you need to send to window or left blank or “ask user” (without the quotes). With sendmsg it needs 3 arguments in this format “0x10 0 0”. The first is the message code see here for a list https://autohotkey.com/docs/misc/SendMessageList.htm The second and third arguments are the wParam and lParam. We could only get the 0x10 (WM_CLOSE) message to work). With win close and asking user for window name you must use inverted commas “” when specifying the name e.g (win close ititle “calc”) will close the calculator window.
win flash process/ititle/class/title (arguments are [“title/process name”] [number of flashes] [ms between flashes] e.g. win flash title “calculator” 10 500)
Examples (arguments are enclosed in square brackets):
win close [foreground]
win center ititle [“firefox”]
win max process [/1275]
win max [ask user]
win close class [CabinetWClass]
Show Message Box [ask user]
speak text ~$clipboard$00)
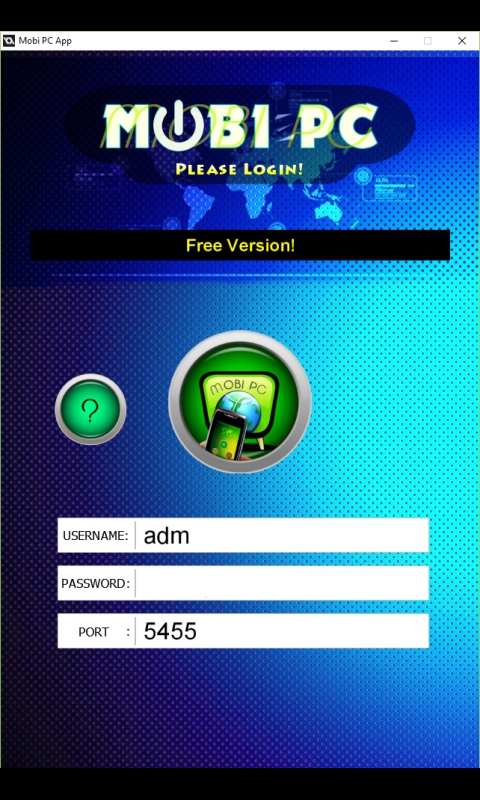
Mobi PC Remote App:
Apps are available for Android and Windows Phone. After the app starts you simply login using the email and password you used to register your account on the server. If the port is set different in the server please enter the same port number in the app or it will not connect! Again if your mobile device uses any kind of VPN or proxy server you will have to disable or reconfigure these. Note after logging in you still have to press the red STATE button to initiate connection to active Mobi PC Server. Once connected the status button turns green and can be clicked on again to confirm your server is still connected and your PC is still switched on.
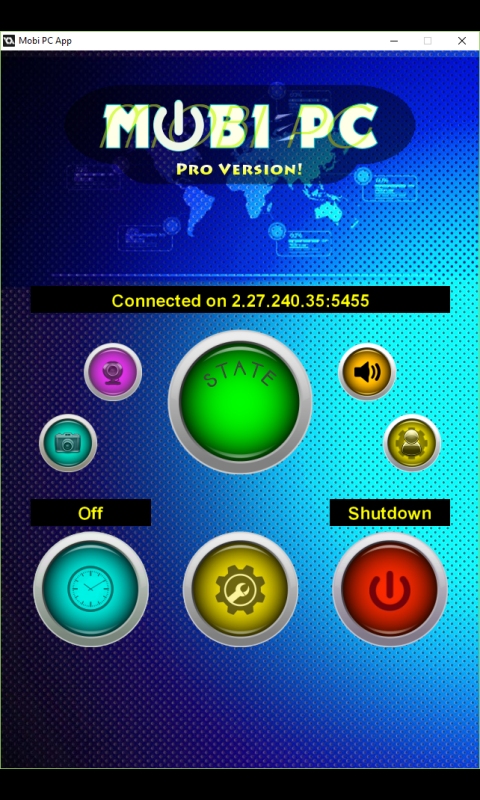
Remote Control Panel:
From here you can access all the functions and settings of the Mobi PC remote apps. From the left top to bottom right here are the button description:
– Webcam Capture (Purple)
– Connect to server/Check PC Status (Green button labelled state)
– Volume Controls (Orange button with speaker icon)
– Desktop Screen Capture (Cyan button with camera icon)
– Mobi PC Extras (Yellow button with cog and user icon)
– Power Down Timer (Cyan button with clock icon)
– Settings (Yellow button with settings icon)
– Power Down (Red button with power icon)
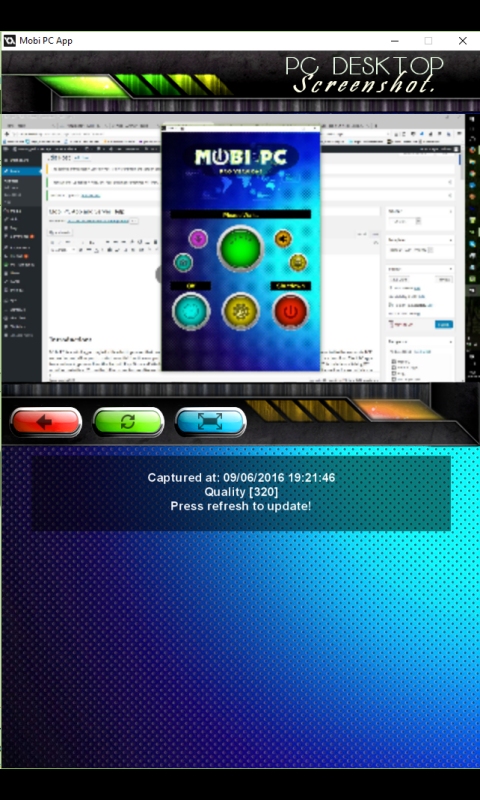
Screen Capture:
The two buttons on the left allow you to get either webcam image capture (purple button) or a real time capture of your full desktop. The webcam image uses the default webcam attached to your PC which must be connected, enabled and fully configured. On some PC you may have to take one webcam capture to select the default camera after this you dont have to and you can request webcam capture fully automated. To get desktop capture press the blue button with camera on it. Once pressed please wait until the image is downloaded. Depending on the quality set this can from few seconds to 20 seconds. Set the quality in settings. You may have to wait 3 seconds between each new request for new capture, on the free version this delay will be longer.
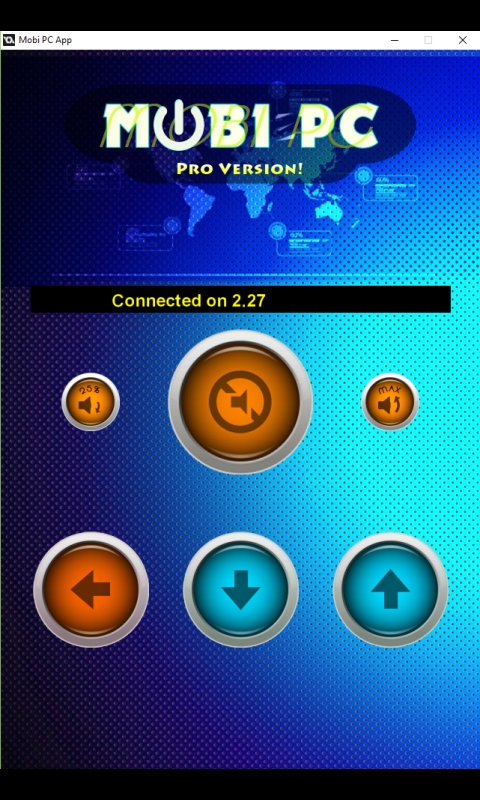
Volume Controls:
Use Mobi PC Remote App to control the volume on your PC. Are you sitting away from the PC and the volume is too high? Press mute to instantly mute the volume. Or you can reduce the volume to 25% by pressing the button on the left. Or maximize the volume by pressing the button on the right. You can also increase or decreased the volume by pressing the blue up/down buttons. This affects the master volume on your PC if you are using different sound devices then you will have to play around to see which volume is affected and set the relevant one as the default playback device in volume control panel on Windows.
Power Down Timer:
Sometimes you need the PC to shutdown after a set amount of time. Maybe you are downloading a file or will be leaving the house soon or just trying to sleep. Press the blue button with the clock on it. Select the timer duration after which the PC will power down (shut down, restart etc..) You can always cancel the power down later if you change your mind.
Settings:
The Remote apps have more settings. Press the Yellow central settings button to bring up the menu.
Manual Connection with IP lets you specify an IP address of the server different from the one associated with your login account. This might be useful if your server cannot determine its external IP but you can using another method such as whatsmyip.org
Disconnect closes the connection with the mobi pc server.
Reconnect uses the same IP to reconnect to the mobi pc server.
PC Power Down Mode lets you select what happens to the PC when you press the shutdown button. Shut down, Restart, Log off,Sleep or hibernate. Please note hibernate may not work on all PC.
Background Colour sets the colour of the app background.
Toggle Server Sounds starts or stops the server from playing notification or function related sounds.
Set Capture Quality allows you to set the quality of image/desktop captures. The lower the quality the faster you can update capture images.
Extra Actions:
This feature allows unlimited extra functions to allow you to control different aspects of your PC like opening files, browsers and controlling the mouse and keyboard. Press Task Man to open the Task Manager on your PC or press again (when red) to close it (note this may not work on all version of windows). Press Next Win to cycle through all the active windows on your PC.
Cast Image:
Available on Android devices when pressed will open up your phones photo chooser. Choose a photo and it will transferred to your PC and be displayed using default program for that image format. This is a new feature and still experimental. May not work properly on all phones.
Mouse:
Control your mouse cursor using the mobi pc Remote App. Move your finger on the big touch pad to move the cursor. Tap the touchpad to position the cursor. Double click the Touchpad to centre the mouse on your screen. On the mousepad you can also move the mouse cursor with a 2 pixel precision by tapping the purple arrows. Press the fullscreen button on lower left of screen to make use the touchpad in fullscreen mode that lets you move the mouse with more accuracy and ease (the left and right mouse buttons are still available on the sides). Use the pink touch pad as a mouse wheel to scroll through web pages. You can emulate keeping either left/right mouse button pressed by doing a long press on either the left BTN or the Right BTN buttons. So you can long press Left BTN and then move the mouse to drag and select files for examples. Release the left mouse button by tapping the Left/Right BTN button. You can also double click each button. The Left and Right mouse button presses will only work on the pro version.
Keyboard:
Press any of the blue buttons to simulate that keypress directly on your PC. You can also send text, URLS, or emails mixed with one or several key presses in one go. Press TEXT and enter the text to send or choose from the drop down menu which is the Text Memory. Press KEY button and select which key you want to send. Only some combinations will have some effect on your PC for example you can select SHIFT then ENTER to create a new line if typing on your PC. You can also manually edit the text before sending by tapping on the textbox. When ready press the send button. Please note that the outcome will depend on which is the active window on your PC and also system settings. To simulate an actual keypress for non character keys use brackets [] for example [enter] or [spc]. If you press Send As Text it will send the text as actual text to be input to the active textbox or window, if you press Send As Keys, the corresponding key presses will be simulated on the active window.
For example to open the Task Manager we use a simulated keyboard shortcut “keypress [ctrl][shift][esc]”.
To simulate say control key and C (to copy to clipboard) use “Keypress [ctrl]c”.
This will select all text in address bar, replace with google.com and presses enter “[ctrl]agoogle.com[enter]”.
Here is a full list of accepted key identifiers (note they may not work on all PC and also this is for a standard UK/USA QWERTY keyboard):
Predefined Key values:
a – z and 0 – 9 (for alphanumeric keys)
F1 – F24 (for Fxx keys), shift, ctrl, alt, enter, esc ,leftshift, rightshift, leftctrl, rightctrl, leftmenu, rightmenu, spc (space), down, up, left, right, home, end, insert, delete, plus, comma, minus, period, lwin, rwin (Windows key), apps, pageup, pagedown, tab, multiply, add, subtract, seperator, divide, backspace, pause, capslock, numlock, scroll, printscreen.
Browser:
Controls for FireFox browser which may also work with other browsers. You can select the address bar or search bar, then go to the Keyboard enter an URL and press ENTER. Open bookmarks and toggle fullscreen or navigate forward backwards etc..
Customs Action List:
The blue CUSTOM action button allows you to execute the custom actions you have set in your mobi pc server. Please be careful using this feature and make sure that the actions set in the server are correct and that any files you reference to still exist and all paths are valid.

Leave a Reply
You must be logged in to post a comment.